SOLUTION of the MONTH:
How to configure your self-hosted WordPress to auto-update…and all that can go wrong
by Webmaster
Problem:
Your organization has decided to host its own installation of Word Press but as it is the most hacker targeted server on the Internet you want to stay on top of all updates/upgrades, especially security updates. You also don’t want to be bothered with the myriad of updates that are required almost daily so an automated solution is warranted.
Considerations:
Aren’t you worried about updates to plugins that could cause conflicts or break existing functionality?
Not really. You have a backup routine running nightly, so you don’t care if one of the updates causes your instance to break or go down. You can always restore to any point in the past.
Solution:
Good news, there’s a plugin in the WP marketplace that comes with a Free Version called Easy Updates Manager (https://easyupdatesmanager.com/)
Free Features Include
- Disable all updates with one click
- Enable automatic updates with one click
- Deeply customize your automatic update settings
- Use logs to determine what and when something is updated
- Hide plugin and theme updates (if custom developed)
- Select which plugins and themes can be automatically updated
- Disable core, plugin, theme, and translation updates
- Force Updates to check that automatic updates are working
- Integrate with UpdraftPlus
- Configure email notification settings
- And much more…
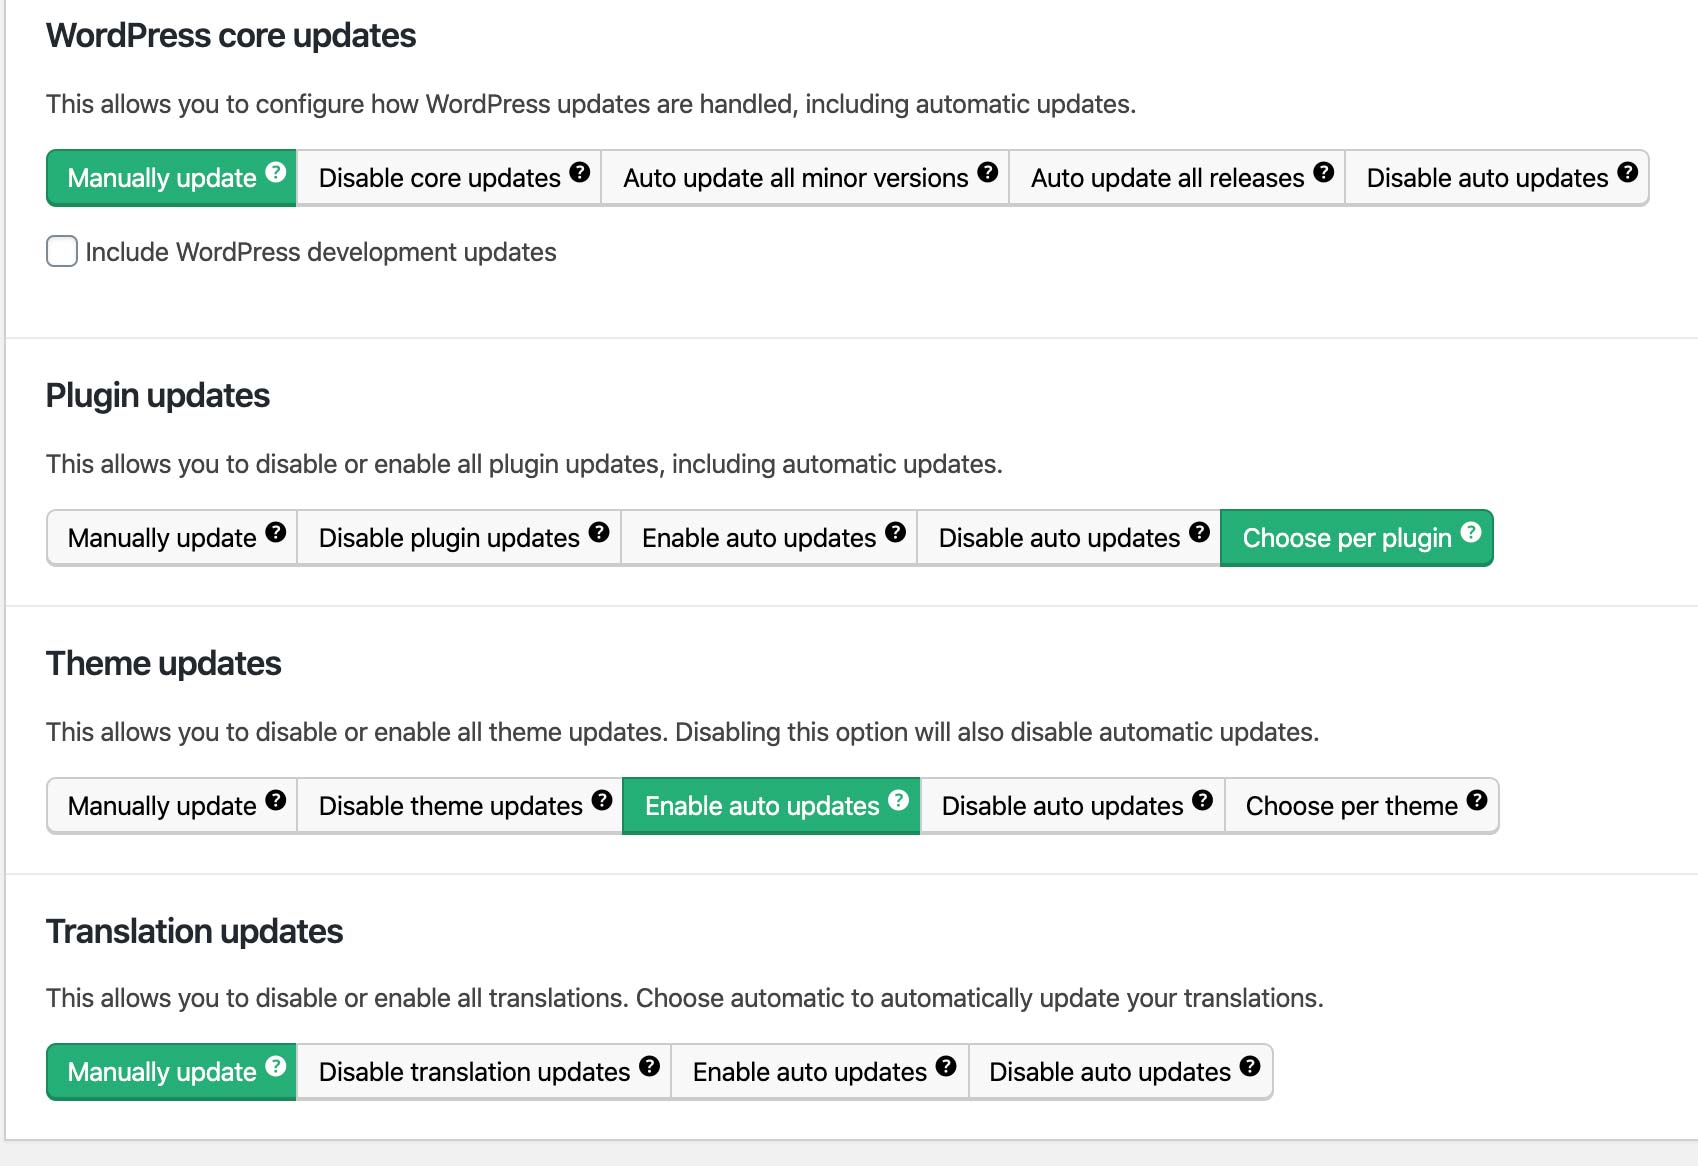
Configuring automatic updates can be an easy process. To enable automatic updates in one click, just click “Auto Update Everything” as shown in the screenshot below.
Of course, you can individually configure your automatic updates by selecting “Choose Per Plugin” or “Choose Per Theme. From there, you can choose what types of updates to receive and even individually configure plugins and themes in their respective tabs.

But why this solution?
- WordPress comes with a built-in automated update (one check mark), but it’s not very customizable.
- This plug-in is Free and it can be customized plus it can give you notifications. What else is there to say?
- What could go wrong? A lot actually, but it’s not the plug-ins fault.
Challenges:
The first of many is actually very common, but you don’t know it’s a problem until you start doing things in the application that required you to have installed WordPress in a very particular way. In a word…Permissions.
The first sign you have a problem is the “…automated WordPress update has failed…” nag at the top of your dashboard. There is a fix, but it only gets rid of the nag, it doesn’t fix the underlying problem.
First, to the nag to see if it’s just hung up
- SSH into your instance
- Locate your update.php file, usually in /usr/share/wordpress/wp-admin/includes/
- Find the nag line and add the following “delete_site_option” code after it.:
nag = isset( $upgrading );
delete_site_option( 'auto_core_update_failed' ); - Close and save the update.php file
- Reload the Updates page and the message should be gone.
- Go back into the file and remove or comment the line you just added.
- Reload the page and the message should still be gone.
If the nag returns immediately, or usually the next day when it tries to auto-update again, you’ll have to try the next fix
- First things first, check your Site Health under your Tools menu.
- If you see any critical issue regarding failures to update, expand and look at the errors.
Most of the time, updates can’t occur because there’s either not enough memory for PHP (which would also show another error message) OR you have a permissions issue with files used by update.php. - Here’s where this Plug-in isn’t just good for free automatic updates, it’s also good at troubleshooting your problems
- If you haven’t done so already, search for and install the plugin, Easy Updates Manager
- Scroll down and add your email address to the Notifications emails
- Go to the Advanced Tab and Force automatic updates. Click Force updates.
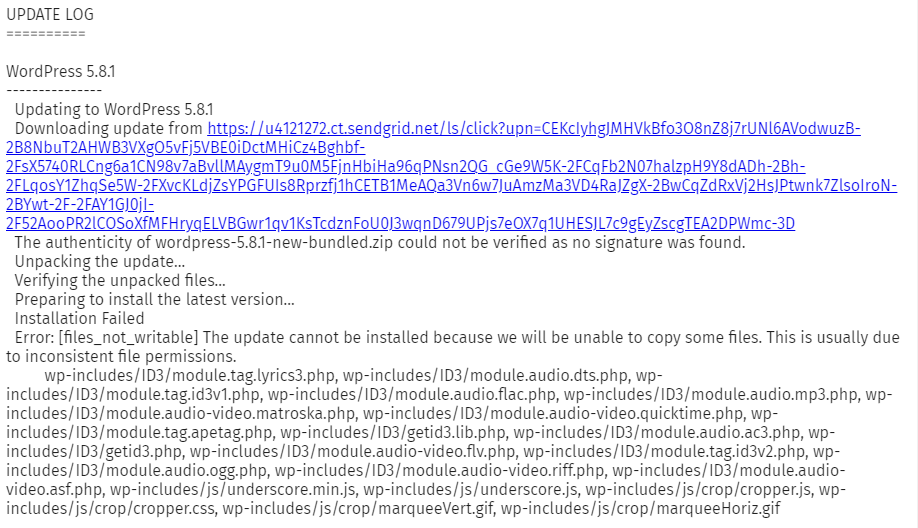
If you don’t see the version number at the bottom right of your screen change, Go to your email and wait for the failure notifications.
Aha! Permissions Problem!
The wp-includes folder under /usr/share/wordpress/ has files that are owned by root:root and they should be owned by www-data, the user & group used to install and run WordPress.
- Change to the directory just above wp-includes and run
chown www-data:www-data -R wp-includes/ - Try another Forced Update and wait for the Notification Email.
- What? Same Error Message?
A closer examination shows that the ID3 folder under wp-includes has a bunch of Sym Links pointing to the ../../../../php/getid3/ folder - Go to one level up from that folder and run
chown www-data:www-data -R getid3/
- Try another Forced Update and wait for the Notification Email.
That’s a LITTLE better, the error message is getting shorter. But there’s still files with permissions issues. - Change to the js/crop/ folder (or the folder listed in your last error message) and list its contents. This folder looks fine, but there’s Sym Links in there too that point to other folders that might be missing the right owner.
- Change to the symlinked directories and figure out which ones have the wrong owner.
In this case it was the cropper folder under javascript - Change directory ../../../../javascript/cropper, go back up one level above cropper, and run
chown www-data:www-data -R cropper/ - Continue this until all of the files folders listed in your notification email have the right permissions and you can receive the following email.
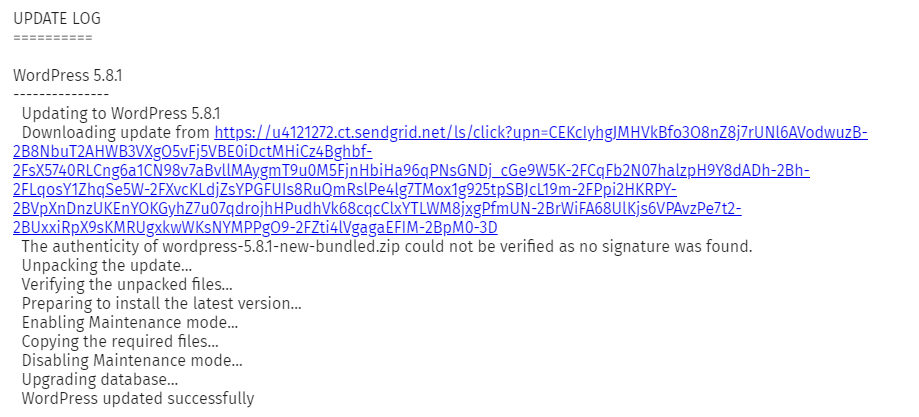
Take-Aways & Lessons Learned:
- Be sure to turn on email notifications so you can stay informed (everyday if necessary) on every upgrade attempt and completion.
- Next time you install WordPress, make sure to follow the installation instructions fully, including using the correct user during installation and/or verify that all of your application’s folders have the correct permissions for the specific user or group of users that need access to them.
